Stop Wondering How To Make NY Cheesecake at Home because this is the definitive, high-authority guide to achieving that legendary dense, velvet texture right in your own kitchen. Master the secrets of the world’s most iconic dessert with professional techniques that guarantee a crack-free finish every single time.

The Ultimate New York Cheesecake
Ingredients
- 1 2 cups Graham Cracker Crumbs (Pulse in your Ninja BN751)
- 2 1/2 cup Unsalted Butter, Melted
- 3 32 oz Full-Fat Cream Cheese, Room Temperature
- 4 1 1/4 cups Granulated Sugar
- 5 1 cup Full-Fat Sour Cream, Room Temperature
- 6 4 Large Eggs, Room Temperature
- 7 1 tablespoon Lemon Juice, Freshly Squeezed
- 8 2 teaspoons Alcohol-Free Vanilla Emulsion or Scraped Vanilla Bean
Instructions
- 1 Preheat oven to 325°F (163°C). Mix cracker crumbs and butter, press into a 9-inch springform pan, and bake for 10 minutes. Cool completely.
- 2 In a Cuisinart Food Processor or stand mixer, beat cream cheese and sugar on low speed until perfectly smooth. Do not over-aerate.
- 3 Blend in sour cream, lemon juice, and vanilla. Add eggs one at a time, mixing just until combined.
- 4 Wrap the outside of the pan in heavy-duty foil. Place in a larger roasting pan filled with 1 inch of hot water.
- 5 Bake for 75-90 minutes until the edges are set but the center still wobbles slightly. Turn off the oven and prop the door open for 1 hour.
- 6 Chill for at least 8 hours in Rubbermaid Brilliance Storage before serving.
The Historical Journey of the Big Apple’s Favorite Dessert
To truly master how to make NY cheesecake at home, one must first respect the heritage of this culinary titan. While many believe cheesecake began in the diners of Manhattan, its roots stretch back to Ancient Greece. In 776 B.C., a primitive form of cheese, honey, and wheat was served to Olympic athletes to provide sustainable energy for competition. The Romans eventually exported this concept across Europe, but it was the accidental invention of modern cream cheese in 1872 by William Lawrence that set the stage for the American revolution.
The specific “New York” style was codified in the 1920s by Arnold Reuben, who pivoted from the curd-heavy European recipes to a richer, cream-cheese-based batter. This version became a cultural staple at legendary spots like Lindy’s and Junior’s. Unlike its lighter counterparts, the New York style is characterized by its high density, heavy use of egg yolks, and a silky mouthfeel that demands professional precision. When you stop wondering how to make NY cheesecake at home and actually follow these steps, you are participating in over a century of culinary evolution.

The Science of Texture: Why Your Cheesecake Fails (And How to Fix It)
Most home bakers struggle with two major issues: cracks and lumps. Understanding the science of emulsification is the key to professional results. If your ingredients are cold, the fat molecules in the cream cheese will not bond properly with the moisture in the eggs and sour cream. This creates a grainy, lumpy texture that no amount of mixing can fix. Always ensure your cream cheese, eggs, and sour cream sit at room temperature for at least two hours before you begin.
The Danger of Over-Mixing
While you want a smooth batter, over-mixing is the enemy of the New York style. Incorporating too much air into the batter causes the cake to rise like a soufflé in the oven. Once it cools, that air escapes, the cake collapses, and deep cracks form across the surface. Professional chefs use the lowest speed setting on their equipment, such as the Cuisinart 8 Cup Food Processor, to ensure a dense, bubble-free consistency. If you see large bubbles on the surface after pouring the batter into the pan, tap the pan firmly on the counter several times to release them.
Essential Equipment for a Flawless Result
You cannot achieve professional results with subpar tools. To stop wondering how to make NY cheesecake at home and start producing bakery-quality results, you need the right arsenal:
- The Crusher: For the most uniform graham cracker crust, use the Ninja BN751 Professional Plus DUO Blender. Its 1000W motor pulverizes crackers into a fine sand, ensuring your crust doesn’t crumble when sliced.
- The Mixer: A Cuisinart 8 Cup Food Processor is a secret weapon for cheesecake. It allows you to process the cream cheese and sugar into a literal paste without whipping in excess air.
- Storage: Once baked, your cake needs to set. Using Rubbermaid Brilliance Glass Storage prevents your cheesecake from absorbing “fridge smells” while it undergoes its crucial 8-hour chill.
- Prep Longevity: If you find a great deal on cream cheese, use the FoodSaver Vacuum Sealer Machine to keep your ingredients fresh longer, ensuring they are at peak performance when you’re ready to bake.
Mastering the Water Bath (Bain-Marie)
If there is one non-negotiable step in learning how to make NY cheesecake at home, it is the water bath. A cheesecake is essentially a custard, and custards hate direct, dry heat. The water bath provides a humid environment and acts as a temperature regulator, ensuring the oven heat never exceeds 212°F (100°C) around the delicate sides of the pan. This gentle cooking method prevents the outer edges from overcooking before the center is set.
How to Prevent Leakage
The biggest fear with a water bath is water seeping into the springform pan and ruining the crust. To prevent this, use three layers of heavy-duty aluminum foil, or better yet, place the springform pan inside a slightly larger silicone cake pan before placing it in the roasting pan. This creates a 100% waterproof barrier, keeping your crust crisp and buttery.
Professional Flavor Variations (Alcohol-Free & Pork-Free)
Traditional recipes often call for vanilla extract, which contains significant amounts of alcohol. To maintain the highest professional standards, substitute with alcohol-free vanilla emulsions or, better yet, the seeds of a fresh vanilla bean. This provides a complex, floral aroma that complements the tang of the cream cheese without the chemical aftertaste of cheap extracts.
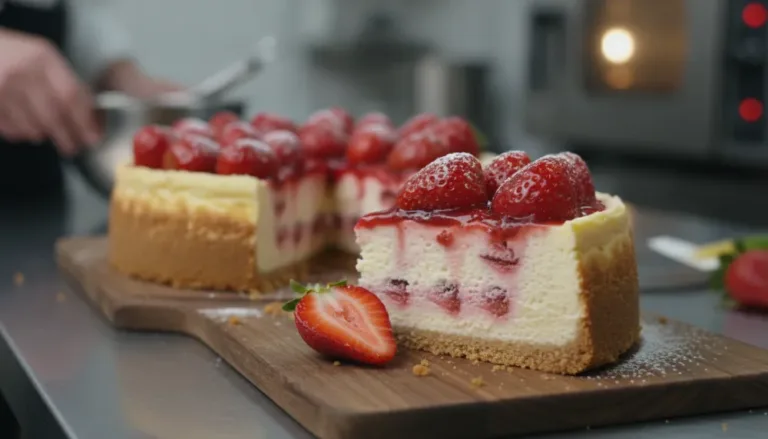
The Perfect Fruit Glaze
Many commercial fruit glazes rely on pork-derived gelatin for stability. To keep your recipe accessible and high-quality, use a cornstarch slurry or fruit pectin. A raspberry reduction made with fresh berries, sugar, and a splash of lemon juice (to replace the acidity usually provided by wine) creates a vibrant, high-gloss topping that sets perfectly without any animal by-products.
The Critical Cooling Phase
Patience is the final ingredient in how to make NY cheesecake at home. A cheesecake continues to cook even after the oven is turned off. If you remove it immediately, the drastic temperature change will cause the cake to contract too quickly, resulting in cracks. By propping the oven door open and letting the cake sit for an hour, you allow the proteins to stabilize gradually. After the oven phase, the cake must be refrigerated for at least 8 hours, though 24 hours is preferred for the best flavor development.
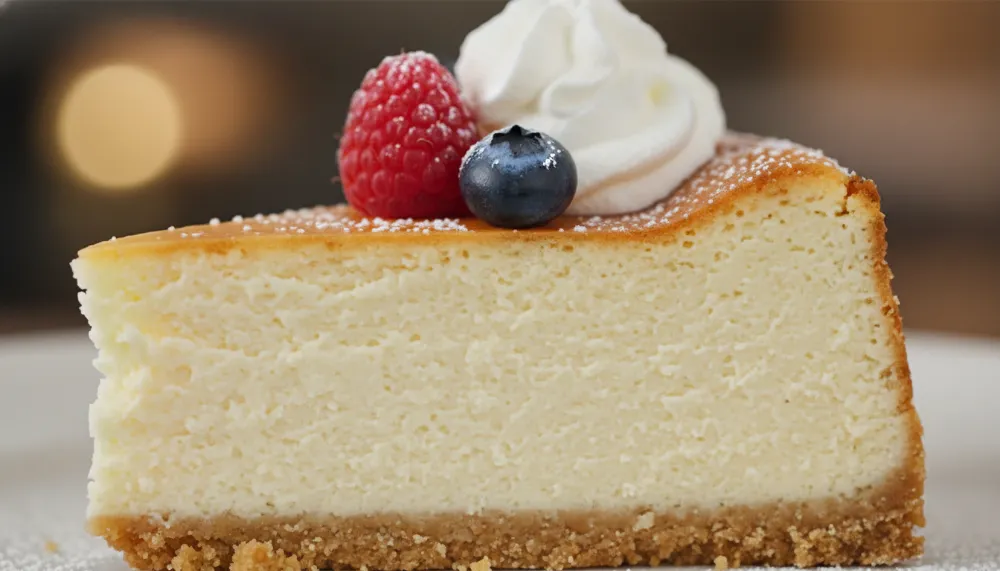
Serving and Slicing Secrets
To get those perfect, clean bakery slices, use a thin-bladed knife dipped in hot water. Wipe the knife clean after every single cut. This prevents the sticky cheesecake batter from dragging and creating a messy edge. If you have leftovers, ensure they are stored in an airtight environment like Rubbermaid Brilliance to maintain that perfect moisture level.
Troubleshooting Common Cheesecake Disasters
Even the best chefs encounter issues. If your cheesecake has a large crack, do not panic. Simply whip together a mixture of sour cream and a little sugar, spread it over the top, and bake for an additional 10 minutes. This creates a beautiful, intentional-looking top layer that hides any imperfections. If your crust is soggy, it likely means your water bath leaked, or you didn’t pre-bake the crust long enough. Ensure you follow the foil-wrapping steps precisely to avoid this in the future.