Mastering the art of a professional-grade Tall and Creamy New York Cheesecake requires a balance of high-quality ingredients and precise temperature control. This guide provides everything you need to recreate the iconic, dense, and velvety dessert that made Brooklyn bakeries world-famous.
Tall and Creamy New York Cheesecake
30 MIN
75 MIN
12 PERS
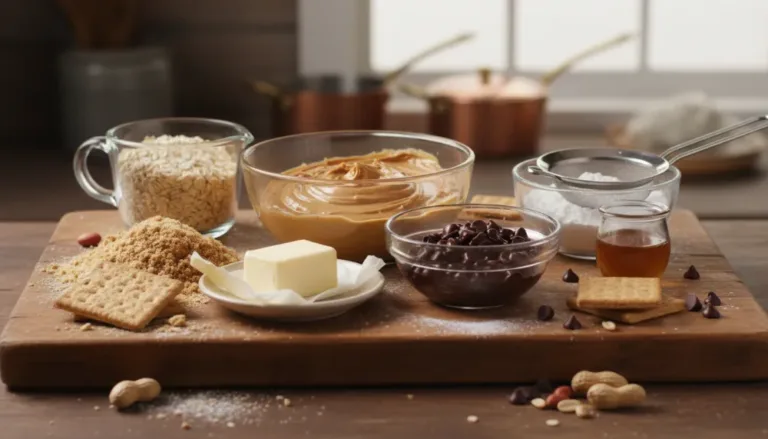
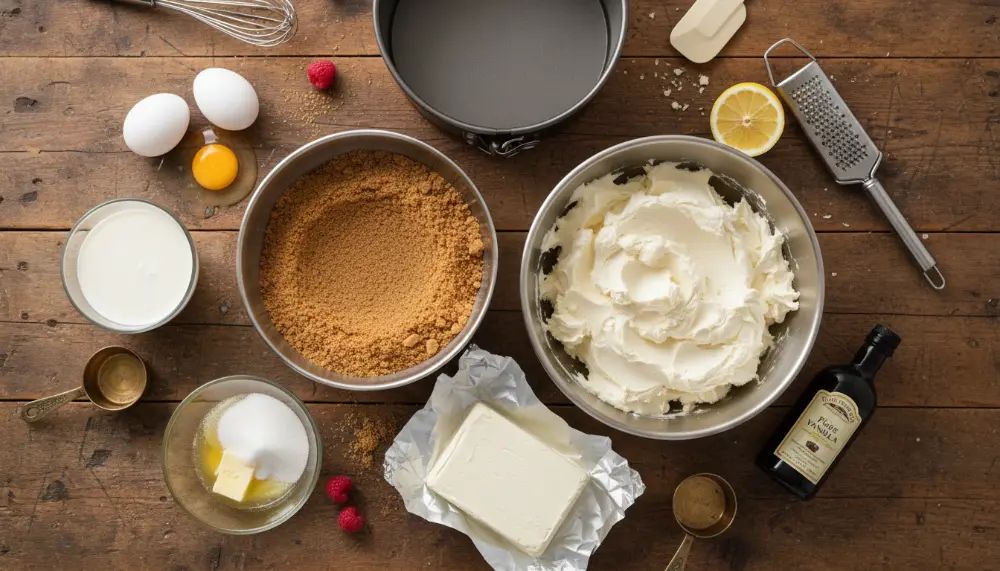
Ingredients
- 1 1.5 cups Graham cracker crumbs
- 2 6 tbsp Unsalted butter, melted
- 3 40 oz (5 blocks) Full-fat cream cheese, room temperature
- 4 1.5 cups Granulated sugar
- 5 3 tbsp Cornstarch
- 6 5 Large eggs, room temperature
- 7 3/4 cup Heavy cream
- 8 2 tsp Alcohol-free vanilla powder or seeds from 2 vanilla beans
Instructions
- 1 Preheat oven to 350°F and grease a 9-inch springform pan. Combine crumbs and butter; press into the pan.
- 2 Beat one block of cream cheese with sugar and cornstarch on low speed until smooth.
- 3 Add remaining cream cheese one block at a time. Mix in vanilla and heavy cream.
- 4 Add eggs one by one, mixing only until just incorporated. Do not over-mix.
- 5 Wrap pan in foil, place in a water bath, and bake for 75 minutes. Cool slowly in the oven with the door cracked.
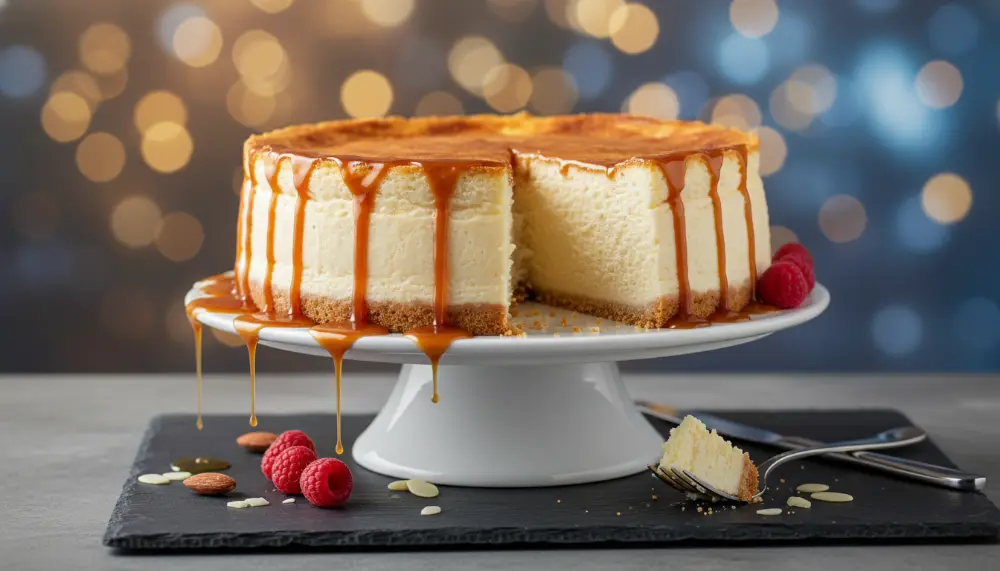
The Architecture of a Tall and Creamy New York Cheesecake
When we discuss the Tall and Creamy New York Cheesecake, we aren’t just talking about a dessert; we are talking about a culinary skyscraper. The hallmark of a true New York style is its unapologetic density and sky-high profile. Unlike its Italian cousin, which relies on ricotta for a lighter, grainier texture, or the French style that leans toward a mousse-like fluffiness, the New York version is all about the cream cheese. Achieving that perfect Tall and Creamy New York Cheesecake requires an understanding of how proteins and fats interact under heat.
To start, you need a solid foundation. While many modern recipes take shortcuts, the authority on this subject remains the 9-inch springform pan. The height is achieved by using a massive amount of cream cheese, specifically 40 ounces. This volume ensures that once the cake sets, it stands at least 3 to 4 inches tall. For the best results in preparing your crust, the Cuisinart 8 Cup Food Processor is a meal prep essential that makes quick work of graham crackers, ensuring a fine, even crumb that won’t crumble when sliced.
The Role of Fat and Temperature
The secret to the “creamy” aspect of the Tall and Creamy New York Cheesecake is the emulsification of fats. You must use full-fat ingredients. Lower-fat versions contain more water and stabilizers, which can lead to a rubbery texture or, worse, a cake that weeps moisture. By using room-temperature cream cheese and eggs, you allow the ingredients to bond seamlessly. Cold cream cheese will inevitably leave lumps, and over-beating the batter to remove those lumps will incorporate too much air, causing the cake to rise like a soufflé and then collapse into a sunken crater.
If you are looking to prep your ingredients or even create a smooth fruit coulis to top your cake, the Ninja BN751 Professional Plus DUO Blender with its 1000W motor is perfect for achieving that silky consistency required for professional garnishes. For those who enjoy experimenting in the kitchen, you might be surprised to know that a Cosori 9-in-1 TurboBlaze Air Fryer 6 Qt can even be used for small-batch cheesecake bites, though for the full-sized Tall and Creamy New York Cheesecake, the traditional oven remains king.
Why Cornstarch is Non-Negotiable for Height
Many home bakers wonder why their cheesecakes lack the structural integrity of a professional Tall and Creamy New York Cheesecake. The answer is often cornstarch. Cornstarch acts as a stabilizer for the egg proteins. As the cheesecake bakes, the eggs want to tighten and coagulate. The starch molecules get in the way of this process, preventing the proteins from over-bonding. This results in a texture that is firm enough to stand tall but soft enough to melt on the tongue. It also provides the “lift” necessary to maintain the height during the cooling process.
Furthermore, the inclusion of a starch allows for a slightly higher baking temperature or a longer bake time without the risk of the cake curdling. When you are aiming for a Tall and Creamy New York Cheesecake, you want that beautiful golden-brown top that provides a slightly toasted flavor, contrasting the sweet, tangy interior. This is a characteristic of the “high-low” baking method where you start at a higher heat and then drop it down to finish.
The Importance of Alcohol-Free Flavoring
In this high-authority recipe, we strictly avoid alcohol-based extracts. Vanilla extract is the standard in most kitchens, but to achieve a deeper, more sophisticated flavor profile that meets specific dietary requirements, vanilla bean seeds or alcohol-free vanilla powder are superior. These provide those beautiful black speckles throughout your Tall and Creamy New York Cheesecake and offer a floral aroma that isn’t masked by the scent of ethanol. You can find high-quality dessert inspiration by looking at traditional methods that prioritize pure ingredients over processed additives.
Mastering the Water Bath (Bain-Marie)
You cannot achieve a perfect Tall and Creamy New York Cheesecake without a water bath. This technique is the ultimate insurance policy against cracks. By surrounding the springform pan with hot water, you ensure the external temperature never exceeds 212°F (100°C). This gentle, moist heat allows the edges of the cake to bake at the same rate as the center. Without it, the edges would overcook and expand while the center remains raw; as the edges then contract during cooling, the tension causes the surface to split.
Make sure to wrap your pan in multiple layers of heavy-duty aluminum foil. There is nothing more disappointing than a soggy crust. Once your Tall and Creamy New York Cheesecake is finished baking, the cooling process is just as critical as the baking itself. A sudden change in temperature is the enemy of height. By leaving the cake in the oven with the door cracked, you allow the internal structure to firm up slowly, maintaining that glorious Tall and Creamy New York Cheesecake stature.

Storage and The 24-Hour Rule
Patience is the final ingredient. A Tall and Creamy New York Cheesecake must be refrigerated for at least 12, and preferably 24, hours. During this time, the fats in the cream cheese and heavy cream crystallize, creating the dense, smooth mouthfeel that is synonymous with the style. If you cut into it too early, the texture will be mousse-like and potentially messy. For storing your masterpiece or any leftovers, the Rubbermaid Brilliance Glass Storage Set of 9 is ideal, as the leak-proof lids keep the cake from absorbing any “fridge smells” while maintaining its moisture.
When you are ready to serve, use a thin knife dipped in hot water to get those clean, professional slices. Every bite of this Tall and Creamy New York Cheesecake should be a testament to your precision and dedication to the craft. Whether you are hosting a formal dinner or simply treating your family, this recipe stands as the gold standard of home baking.
Common Troubleshooting Tips
If you find your Tall and Creamy New York Cheesecake has cracked despite your best efforts, don’t despair. Most cracks occur because of over-mixing (incorporating air) or the cake sticking to the sides of the pan. To prevent sticking, run a thin spatula around the edge of the cake immediately after removing it from the oven, before it begins to shrink. If a crack does appear, a simple fruit compote or a layer of sour cream topping can hide it perfectly while adding another layer of flavor.
Remember, the goal is a Tall and Creamy New York Cheesecake that reflects the richness of New York’s culinary history. By following these professional protocols, from the “Starter Batter” method to the slow cooling phase, you are guaranteed a result that rivals the best bakeries in the world. For more tips on achieving the perfect bake, check out our other healthy and delicious guides.