Master the art of baking truly crispy sourdough bread with our ultimate guide, ensuring a delicious sourdough loaf from a bubbly starter to a perfectly golden, crunchy crust.
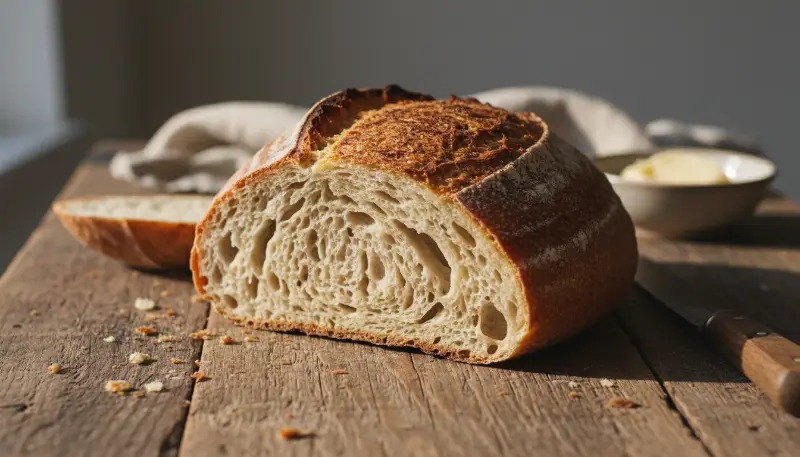
There’s nothing quite like the crackle of a perfectly baked loaf of homemade sourdough, and achieving that sought-after crispy sourdough bread crust is a baker’s triumph. This guide is your definitive resource for crafting an exceptional sourdough loaf with an unbelievably crunchy exterior and a soft, airy interior, guiding you to the perfect crispy sourdough bread. Whether you’re a seasoned baker or just starting your sourdough journey, our detailed sourdough recipe will help you achieve the perfect sourdough every time, ensuring a delicious sourdough experience from start to finish. Say goodbye to soft, chewy crusts and hello to the satisfying crunch you’ve always dreamed of!
Kitchen Essentials for Your Sourdough Journey
Baking truly crispy sourdough bread and other delicious recipes is made easier with the right kitchen tools. Here are some of our favorites:
- For whipping up smooth tahini sauces for your spreads or pureeing ingredients for a hearty soup to accompany your freshly baked bread, the Ninja BN751 Professional Plus DUO Blender offers high-power performance that is simply unbeatable.
- If you’re roasting chickpeas or perfecting crispy vegetables to serve alongside your sourdough, the Cosori 9-in-1 TurboBlaze Air Fryer 6 Qt is a game-changer. It ensures perfect results with less oil and has ample capacity for family meals.
- A reliable food processor is essential for meal prep. The Cuisinart 8 Cup Food Processor excels at fast chopping, slicing, and shredding, making complex recipes feel effortless.
- After all your hard work, you’ll want to store your baked goods and ingredients properly. The Rubbermaid Brilliance Glass Storage Set of 9 is perfect with its crystal clear, leak-proof, and stackable design.
- To keep your bulk ingredients, like different flours for your sourdough starter guide, fresh for longer, the FoodSaver Vacuum Sealer Machine is an invaluable investment. It prevents freezer burn and keeps food fresh up to 5x longer.
Ingredients for Your Crispy Sourdough Bread
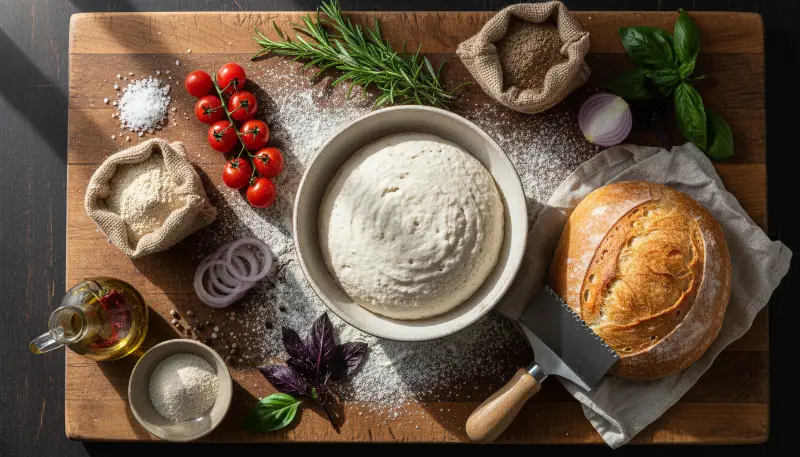
Achieving the perfect crispy sourdough bread begins with high-quality ingredients. Here’s what you’ll need for this delicious sourdough recipe:
- Flour:
- 450g bread flour (organic unbleached, 12-14% protein content recommended)
- 50g all-purpose flour
- 30g whole wheat flour (optional, for added flavor depth)
- 50g white rice flour (for dusting banneton, prevents sticking)
- Water:
- 350g filtered, dechlorinated, or spring water (lukewarm, around 80°F / 27°C)
- Sourdough Starter:
- 80g active, ripe, and bubbly sourdough starter or levain (fed 4-12 hours prior)
- Salt:
- 10g fine sea salt
- Optional for Enhanced Crispiness/Flavor:
- 2-3 ice cubes (for steam in Dutch oven)
- A light spray of cold water on the dough before baking
- Various inclusions like olives, pistachios, thyme, dried tomatoes, sunflower seeds, capers, rosemary, cheese, mint, dill, flaxseeds, sesame seeds, sprouted grains (add during bulk fermentation)
Step-by-Step Guide to Crispy Sourdough Bread Perfection
Follow these meticulous steps to bake your ultimate crispy sourdough bread, a truly perfect sourdough loaf, designed to give you that incredible crunch:
Preparation Phase
- Feed Your Starter: Ensure your sourdough starter is vibrant, active, and bubbly. It should have doubled in size after being fed 4-12 hours before you begin. A healthy starter is the foundation of a delicious sourdough.
- Gather and Measure: Precisely measure all your ingredients, ideally using a kitchen scale for accuracy.
- Prepare Proofing Basket: Generously flour your banneton proofing basket or a bowl lined with a clean tea towel. Rice flour works exceptionally well here to prevent sticking.
Dough Mixing and Fermentation
- Combine Water and Starter: In a large mixing bowl, gently whisk or stir together your active sourdough starter and the lukewarm water until the starter is mostly dissolved and incorporated.
- Add Flour and Salt: Introduce the bread flour, all-purpose flour, whole wheat flour, and sea salt to the wet mixture. Mix thoroughly until a shaggy dough forms, ensuring there are no dry pockets of flour. For even better gluten development, consider an initial autolyse, where you mix water, starter, and most of the flour, letting it rest for 30-60 minutes before adding the salt.
- Bulk Fermentation & Stretch and Folds: Cover the dough and let it begin its bulk fermentation at a comfortable room temperature (around 70-78°F or 21-26°C) for 4-6 hours. During the initial 2-3 hours, perform 3-4 rounds of “stretch and folds” every 30-60 minutes. To do this, gently lift a portion of the dough, stretch it upwards, and fold it over itself. Rotate the bowl and repeat until you’ve gone all the way around. This builds gluten strength, crucial for a good crumb in your crispy sourdough bread.
- Bench Rest (Optional): After your final set of folds, allow the dough to rest undisturbed for about an hour in a warm spot, letting the gluten relax. For more insights on perfecting your fermentation, you might find valuable healthy breakfast ideas or quick dinner recipes that incorporate fermented foods on our site.
- Pre-Shape: Carefully turn the dough out onto a lightly floured surface. Gently shape it into a loose round or boule. Cover and let it rest for 20-30 minutes, allowing the dough to relax before its final shape.
Shaping and Cold Proofing
- Final Shape: With a light touch, shape the dough into a tight boule or batard. The goal is to create surface tension. Avoid excessive flour, as a slightly wetter dough contributes to a thinner, crispier crust.
- Cold Proofing: Carefully place the shaped dough, seam-side up, into your prepared banneton. Cover it snugly with plastic wrap and transfer it to the refrigerator for a “cold proof” or “cold retard.” This overnight rest, typically 10-24 hours (or even up to 48 hours), significantly deepens the flavor of your sourdough bread and makes the dough much easier to handle.
Baking for Maximum Crispiness
- Preheat Oven and Dutch Oven: This is a critical step for crispy sourdough bread. At least 30 minutes to 1 hour before baking, place your Dutch oven (with its lid) inside your oven. Preheat both to a very high temperature, ideally 475°F (245°C). The Dutch oven must be screaming hot.
- Prepare Dough for Baking: While the oven preheats, remove your dough from the refrigerator. Turn it out onto a piece of parchment paper. For an extra blistered and crispy crust, lightly dust the top with flour or spray it liberally with cold water.
- Score the Dough: Using a sharp bread lame or a razor blade, make a swift, confident score across the top of your dough. This allows the loaf to expand beautifully and helps control where the crust cracks, contributing to oven spring.
- Bake with Lid On (Steam Phase): Carefully lift the parchment paper with the dough and gently lower it into the preheated Dutch oven. For an unparalleled crispy sourdough crust, add 2-3 ice cubes between the parchment paper and the side of the Dutch oven. Immediately cover with the lid. Bake for 25 minutes. The trapped steam creates an ideal environment for maximum oven spring and prevents the crust from setting too quickly, ensuring it remains thin and pliable.
- Bake with Lid Off (Browning & Drying Phase): After 25 minutes, carefully remove the lid from the Dutch oven. Continue baking for another 18-22 minutes, or until the crust is a deep, rich golden-brown and wonderfully crispy. For an even deeper color and crisp, you can turn off the oven, crack the door slightly, and let the bread sit for an additional 15-20 minutes. The internal temperature of a perfectly baked loaf should be 205-208°F (96-98°C).
- Cool Completely: Transfer the finished crispy sourdough bread to a wire cooling rack. Resist the temptation to slice it immediately! Allowing it to cool completely for at least 1-2 hours (or even longer) is vital. Slicing hot bread traps moisture, leading to a gummy interior and a much softer crust, diminishing all your efforts for that perfect sourdough crisp. For other amazing baking projects, check out our sitemap for more delicious recipes. This easy sourdough recipe is truly satisfying.
Top Questions About Crispy Sourdough Bread
1. Why isn’t my sourdough crust crispy after cooling?
The main culprit is usually too much residual moisture in the bread. As the loaf cools, moisture from the crumb migrates to the crust, causing it to soften. Ensuring thorough baking and complete cooling on a rack is key for maintaining that crispy sourdough integrity.
2. How can I make my sourdough crust crispier?
- Extend the uncovered baking time slightly to allow more moisture to evaporate.
- Always bake at very high temperatures, typically 450-500°F (232-260°C).
- Utilize a Dutch oven for initial steam, then remove the lid to promote drying and browning.
- Introduce extra steam by spraying the dough with cold water or adding ice cubes to the Dutch oven during the covered bake.
- Ensure the bread cools fully on a wire rack.
3. Does humidity affect sourdough crust crispiness?
Yes, absolutely. A humid environment can cause the crust of your crispy sourdough bread to absorb moisture from the air, leading it to soften more quickly after it cools. Storing it uncovered in a bread box can sometimes help, but extreme humidity is a challenge.
4. How long should I bake sourdough for a crispy crust?
Generally, aim for 20-30 minutes with the lid on (for steam and oven spring) and then an additional 15-25 minutes with the lid off (for browning and crisping). However, exact times vary based on your oven and desired crust color.
5. What role does steam play in a crispy sourdough crust?
Steam is crucial in the initial baking phase. It keeps the crust pliable, allowing the dough to expand fully and achieve maximum oven spring before the crust sets. This prevents a thick, tough crust and lays the groundwork for a thin, crispy exterior once the steam is released.
6. Can I get a crispy crust without a Dutch oven?
Yes, it’s possible! You can bake your sourdough on a preheated baking sheet or pizza stone. To mimic the Dutch oven’s steam environment, place a pan of boiling water on the bottom rack of your oven during the initial baking period.
7. Why is my sourdough crust too thick or chewy instead of crispy?
This often points to insufficient steam during the initial bake, which inhibits proper oven spring and leads to a denser crust. It could also mean not enough moisture evaporated from the bread during the uncovered bake, or excessive flour on the dough’s surface.
8. How can I make stale sourdough crispy again?
A simple trick is to quickly run the entire loaf under cold tap water, ensuring the crust is damp but not soaked. Then, bake it in a preheated 450°F (232°C) oven for 10-15 minutes. This rehydrates and re-crisps the crust beautifully.
9. Does high hydration contribute to a crispy crust?
Generally, higher hydration doughs tend to yield a thinner, crispier crust. More water in the dough creates more steam during baking, which aids in better expansion and a more delicate crust structure. However, it requires careful baking to ensure all that extra moisture bakes out properly.
10. What internal temperature should sourdough reach for a crispy crust?
For a perfectly baked loaf with an excellent crispy crust, the internal temperature of your sourdough bread should register between 205-208°F (96-98°C) when it’s finished baking, which helps achieve that desired crispy sourdough bread texture.
Note: This post may contain affiliate links, which means we may receive a commission if you make a purchase through these links at no extra cost to you. We only recommend products we genuinely love and trust.